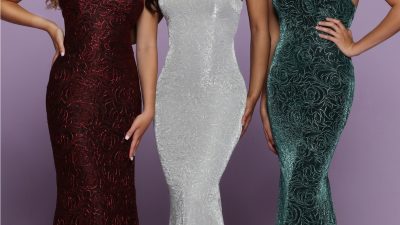

Planning for prom night is so exciting, it’s easy to be tempted to go all out with the latest trends from head to toe. But do keep an eye on the future—you don’t want to look back at your prom photos and cringe at your spur of the moment color blocked hair or pricey extensions that just didn’t turn out right. You also want to dazzle without spending a fortune, so to help, we’ve found 6 of the prettiest twist hairstyles out there for prom season. They all look superb even when done by a novice, so have fun playing around and see if one of these won’t make you look beyond beautiful on your big night!
1. The Wrapped Headband Updo
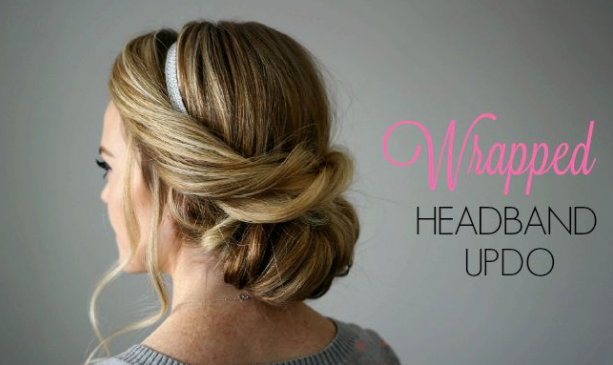
This style is ideal for long and medium-long hair and will work with any stretchy headband. If you want a little more oomph, curl your hair before putting it up and tease the crown a bit for fullness.
- Set the headband around the crown of your head without pulling the front of your hair back, then secure with bobby pins.
- Leaving a generous strand on either side to cross over later, pull the rest into a loose ponytail.
- Roll the ponytail into a wide bun & secure with bobby pins.
- Doing one side at a time, twist each side strand , pull it around the back, cross each strand over the top of the bun and secure.
- Secure the twisted sides by pinning them into the headband and also to hide as much of the headband as you wish.
- To soften the look, pull a few strands loose and curl. To keep it sleeker, use a good holding spray and tuck in all loose strands using bobby pins or hair pins to keep them in place.
Click here for the full photo tutorial: https://www.pinterest.com/pin/418553359099543031/
2. The 4-Step Easy Twisted Bun
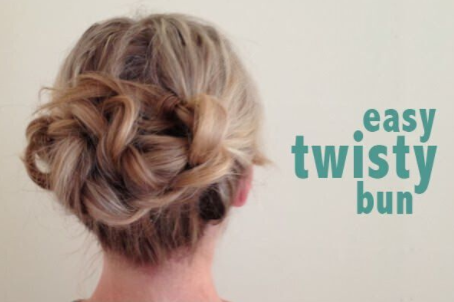
For medium length hair, there’s good news! You can still wear a bun. This style starts out looking like Little Girl and ends up as Fabulous Young Woman.
- Split your hair into two high pigtails in the back.
- Twist each and secure the ends with a tiny rubber band.
- Wrap each twisted tail up and around the other.
- Secure with bobby pins or clips and tuck in a few flowers or a pretty comb.
For the full photo tutorial, click here: https://www.pinterest.com/pin/77898268531711486/
3. The Twisted Ponytail
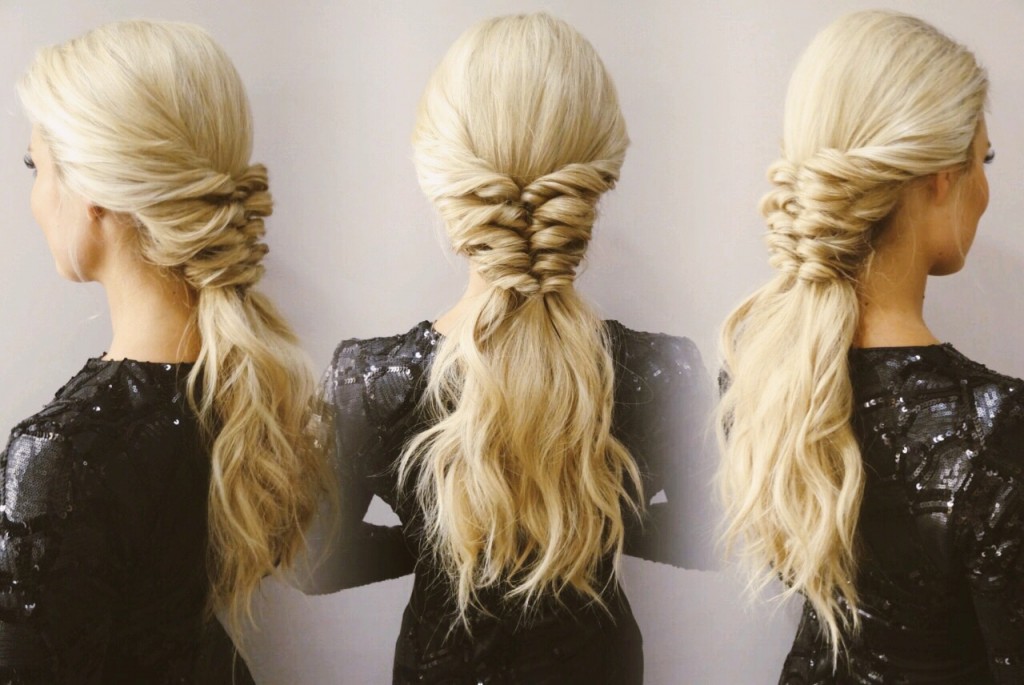
For something a little less formal but still amazing, try a twisted ponytail. This hairdo looks complicated, but it’s fast and easy once you get the hang of it.
Tip: Practice this one for school a few times to see how you like it and how to make it go faster!
- Wash your hair and add a generous dollop of mousse, then dry using whatever technique you like to create fullness, particularly at the crown.
- Take a strand from each side of the front, twist each end to meet at the back, and make a small half-ponytail.
- Repeat 4 times, laying each ponytail under the preceding one. Use more layers if necessary until you reach the nape of your neck.
- Pull each ponytail loose enough to hide the rubber bands and secure with bobby pins if needed.
Note: If you have thick or curly hair, or wear a longer straight bob, this style should work with shoulder length hair. When you’re done, tuck the loose ends in with pins.
Click here for the full tutorial: https://www.bangstyle.com/posts/Twist-Ponytail-Tutorial-Kiley-Potter-470
4. The Reverse Braided Bun
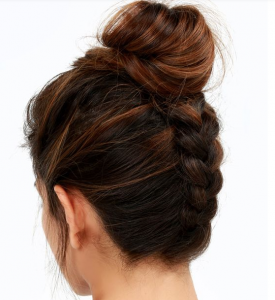
Braids are all the rage, but they can look ordinary if you’re not careful. Here’s an updo that makes a classic style new again and adds that fun, messy bun look at the top.
- Bend over and starting from the bottom, comb all your hair forward.
- Still bending over, start at the nape and do a thick French braid just until you reach the crown.
- Gather everything into an elastic band then make a messy bun.
- Using bobby pins, secure the bun, use hairspray to set, and curl any tendrils if you wish. Or keep it sleek with more hairspray or gel.
Click here for the full tutorial: http://www.himisspuff.com/easy-diy-braided-hairstyles-tutorials/47/
5. Half-Up Criss-Cross
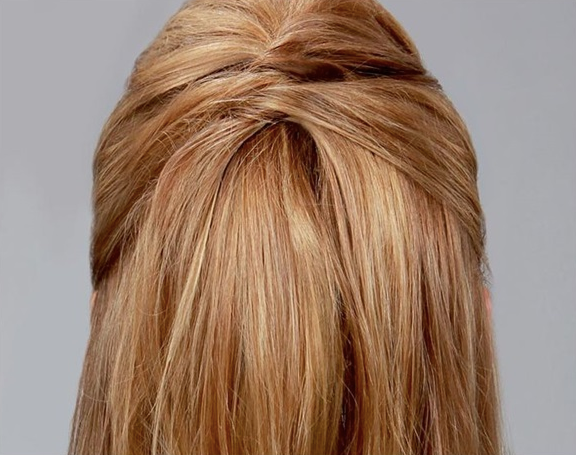
This is a great minimalist look that works with almost any texture hair. It does work a little bit better on straighter or gently wavy hair, though. So if you want the look but have massive curls, consider a flat iron.
- Wash your hair, add some mousse, then dry and build in some volume.
- Tease the crown just a bit.
- Take the topmost portion, twist and secure it with a bobby pin.
- Repeat using 2 or 3 more sections, pinning each below the other in a criss-cross pattern.
Get the full tutorial here: http://www.fenzyme.com/simple-five-minute-hairstyles/2/
6. To-Die-For Short Hair French Twist
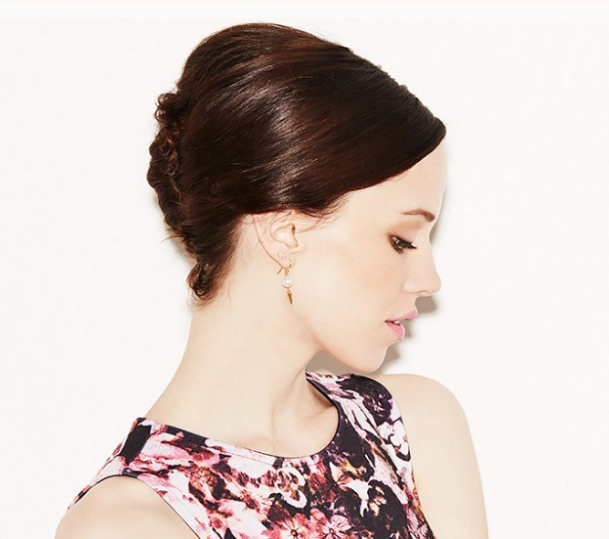
Who says that short hair can’t pull off an Audrey Hepburn twist? This style will also work with fine hair that doesn’t have enough fullness for a thick, fluffy standard twist. Here’s how to achieve a simple French braid that will shock those non-believers.
- Start by parting your hair either on one side or in the middle.
- Pin one side to the middle back.
- Gather the unpinned hair from the opposite side and twist inwards for a tight twist.
- Use pins to secure the bun, then add more pins until it stays put.
Tip: The real trick to this look is backcombing or teasing the crown enough.
Click here for the full photo tutorial: http://www.byrdie.com/french-twist-on-short-hair/slide10
Pro tip: Be sure to practice these at home a few times until you’re happy with the results. You also don’t want to run late on prom night trying to get them right. We’ve worked to keep them simple, but some do take a little technique. Play around until you find the style that works with your hair, then get gorgeous and have fun!
For more tips and tricks for gorgeous prom ideas, check out our primer on the season’s hottest hair and how to make the most of what you’ve got: